21/05/2009

Tau Hammerhead Step by Step part 2

So continuing the Hammerhead walk-though. Not a vast amount of progress today, but a very important stage - Part one of the cleanup process.

Now that the hammer head had dried over night i visually inspected the body for where mould lines were very visible. Often i find that these only become truly visible once construction has started (as they end up being disconnected in odd ways, making the effect even worse!

In the two photos shown here i have circled the main areas of mould lines that needed to be removed. I never use a knife to remove mould lines on vehicles, the scratching leaves a very telltale mark! So its back to our friendly 800 grade wet'n'dry, and an hour or so of slowly buffing away the lines. I find that it helps to do this whilst watching TV, or chatting to the wife etc! Take your time, moving slowly through the affected areas.

The aim is to achieve a smooth effect, without damaging any major surface detail. I normally dont worry if there are a few lines showing where the sand paper has been (as generally these areas will be re-sanded later, once any gaps have been filled, but I always try to move the paper in the same direction if at all possible.

Here you can see the result across the nose of the Hammer head - notice that the major lines are now gone, and that the sanded section is fairly smooth. On the side "fins" it was much harder to get a smooth finish to the plastic, because of the difficult shape.

However, there is a large gap in this area that will need to be filled in later, so I'm not too worried. (As mentioned this will be filled and then re-sanded).

More progress reports soon. For the moment I'm off to prepare the Bad Bay Hackers for another defeat on the Blood Bowl field!


20/05/2009

Tau Hammerhead Step by Step part 1

So after my last post, i wanted to start a new post with something 40K related - i opened my cupboard and what did i spy - The hammerhead that I've been meaning to paint for a while!

I'm going to present it as a series of linked posts, each detailing a small part of the project. Hopefully that way you guys can give me suggestions along the way, and so that i can have something to write about on the blog!

So today, im covering the basics of construction...

The first thing that i did was to remove all the parts from the sprues and ditched them all in to the box lid. Do not do this unless you have built a tau vehicle before! Its sad that ive made so many devil fish now that i dont need the instructions any more!

Once i had all the pieces i started to clean up the major components. This is quite a long winded process. First each piece has the moulding lugs trimmed down carefully using a sharp craft knife - making sure not to mark or "dig-in" to the plastic. The aim is a smooth finish, but if there are some small marks there, dont worry...

Then 800 - 1600 grade wet'n'dry sand paper is used to smooth off any bumps. When doing the sanding, you will never get all of the injection points completely smooth, usually I find that I get down to a small indentation. These are taken care of later with the help of some model filler.

One of the big problems i have with the Citadel flyers is the pitiful bases they supply them with, especially given the tiny lug they expect to hold the weight of a large plastic model.

For this model i wanted there to be a large stand for them to be mounted on - the final aim for this model is to place it on a small cityscape terrain base, so something solid would be welcome. In the end i decided to use a piece of Evergreen strip styrene. A hole was drilled in the base piece of the Hammerhead and the strip was then glued to the inside of the chassis (is that the right word?)

From the photo, you can see quite how far in to the model the stand extends - hopefully this will give extra sturdiness to the model. I have a feeling that more support may be needed in the future... but for the moment it at least makes it easier to work with!

So at the end of the first day, i have a partially constructed hammerhead. Next stage is the gap filling, which will be tackled on a future date...

On a slight aside, im testing a new blogging client, so if anyone notices anything wrong with this post (beside my usual awful spelling!) please let me know.


19/05/2009

Blood bowl team sheet and blood bowl league match reference

I wanted to post this up for any Mac Blood bowl players out there - Its a template for numbers that allows you to track your team throughout the coarse of a league. It includes graphs showing the number of SPP each player is on and will auto calculate your team value, as well as showing the basic rolls that each player needs.

You can download it here. The download includes usage instructions

Ive also uploaded a match reference sheet. Its an alternative version of the GW one.. It includes all the pre match, post match, improvement rolls etc. Hope you find it useful

You can download it here. Its in PDF format


Blog struggles, amongst other things....

So i've just read Ron's post over at FtW about writing blogs and i wanted to put up a longer post about my own blog writing problems, and where the future of this site is headed...

When i started my blog, it was during a renewed interest in 40K - Ive been playing since first edition, but i had finally convinced a friend to start playing, so i actually had someone to game against. Full of 40K fervour i figured that i would start a blog to encourage myself (essentially so i could look at it on the dark days when im stuck in a room with only XCode and a cup of fresh coffee to see me through!).

Unfortunately, we dont seem to be able to get many games of 40K in, generally we get to play about 3 or 4 games a year! There is also the small problem that ive realised that i totally hate the whole process of actually building and painting an army.

Let me explain a bit further - Im first and foremost a painter, that is where my true passion for the hobby lies. I think im okay at it too (Im not gonna win golden demon any time soon, but im happy with my abilities on the whole). On the other hand, whilst i enjoy playing the games, ive never been very good at them. My current record is one win at 40K (out of maybe 20 games)! I can accept this fact, and just look at games as being a cool alternative to playing video games with friends - as i see it, its no different than meeting friends for a game of poker.

But this all relies on me having an army! And guess what? We are back to the hating building an army. My problem is that I try to paint all the models in the army to the same standard - my display standard. Eventually (about 1/4 of a squad in) i realise that wont work and skip some steps. Then i get annoyed because the unit doesnt look consistent, so i try to simplify the paint job on the next unit.... Eventually ill have a couple of units, but they dont work together because ive changed the painting style so much. So i'll then scrap those models and start again! Given that im essentially a guard player (with the occassional foray in to Tau) I end having no where near the number of models that I really need to win a game... and the cycle continues...

So my first question for this post is:

Does anyone have any good solutions for this problem?

I read lots of other 40K blogs (especially the FtW group blogs), and im in awe and wonderment at the progress you all make on your armies - You seem dedicated, all your models look consistent and form great looking armies! So how do you all maintain the energy?

Anyway, i digress... I was talking about Rons post on FtW. Ron was commenting on how hard it was to keep the blog going, and this was mainly what i wanted to talk about - essentially the lack of Warhammer / 40K related posts on my blog. Essentially i read other peoples blogs and they are (as i said) full of great posts about army progress, or filled with really interesting tips; Then i come back to my blog to write a new post (for example i was going to post about stripping miniatures, but as soon as i looked on the net i found hundreds of other posts about the same subject) and I lose the will! Often what stops me from posting is that i feel that I have nothing original or interesting to say about the subject. So that leads me to my next question:

How do you guys learn these new and interesting techniques if not from other peoples blogs?

So anyway.. thats my little discussion about writing a blog... Its much harder than it seems; i now understand why so many blogs start up and then dissapear. Even discounting everything i said above, there is still the problem of actually finding the time to write a post!

In the meantime, dont worry, Exponent Wargames isnt going anywhere, but please forgive the lack of 40K content. I promise that ill get something together soon (the new guard codex and plastic valkyre should get me going again ;)).


Artemis

New model to show y'all - Artemis by Hasslfree miniatures, who rank as one of my favourite miniature vendors! Not much to say about this one, other than she was lovely to paint, Enjoy!


12/05/2009

Subject X1

I came across this bust on the JMD miniatures website. They make some of the nicest models ive come across and the moudling is superb, very little cleaning up required.

He was painted using a combination of vallejo, citadel and newly for me, some Formula P3 paints. These are made by Privateer Press, and i have to say, ive been very impressed with them. Unusually for the fantasy miniature world, they dont just ape the GW colour range, and their whites in particular are very nice to work with. In general the paints are more opaque than the vallejo or citadel ranges (the closest is probably the citadel foundation range). The thin extremely well, even with just water and the whites dont become chalky. I would highly recommend trying them out, especially Menoth white base and highlight and Sanguine base.

With Subject X1 I was trying to achieve the look of something that was, at one stage, human, but the experiments that have been performed on him have changed him inside and out! I also wanted to give the impression that he was a test subject, hence the shaved head and barcode on the back of his neck.

Hope you like him!


28/04/2009

Dirt Diver

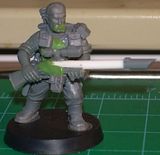
Sorry for the long time since my last post. Unfortunately Real Life got in the way (along with the Bang Face Weekender, which was awsome!). I have had time tho to paint up a new mini! This one is a conversion based on a Smart Max model that i picked up at Salute. The original had a cool claw thing, Ive replaced this with a new banner. I also removed the horns and replaced them with sun glasses / dust googles.
I had such fun painting this model, that i thought i would write up a new character sheet to use this character in 40K. So I present you with Master Sergeant “Dirt Diver” Arak! Hope that you like him. (And yes the name does come from "The unit")


And here are the 40K rules for using Dirt Diver