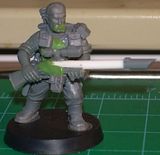
So after my last post about miniature photography, i figured that i would try out some of what i had read, and try and improve the quality of the photography on the site.
The first thing that i did was to setup a sheet of white paper, underneath my OTT-Lite. OTT-Lites give out "daylight" (that is, light of the same frequency as daylight), so it gives a very natural look to the models. You can see this setup in the picture below
I decided to use the HQ from my Tau as these were the impetus for learning more about miniature photography - I really like my small Tau army and wanted to put it online for a few people to take a look at. Unfortunately the only photos i have of the Tau are low res phone cam pictures, not really suitable for a blog!
Once i had the miniatures setup, i placed the camera approximately 3-4 inches from them (on the picture above its about where the edge of the green cutting matt is). I then found the first problem - the OTT-Lite was casting very bad shadows, which you can see in the image below:
So i used another angle poise light that i had lying around and taped a piece of toilet tissue over it. I moved this around trying out various shots, which you can see below, in their "raw" state:
Once i had taken a couple of dozen shots, i pulled them all in to photoshop, and after consideration chose these two images to work with:
Ive only performed basic operations on these files - I've altered the size, cropping and adjusted some colour balance...
So, my first proper attempt at miniature photography is done, and i have to say, it went "kinda" well - On the plus side, the images i have captured are a lot better than the previous attempts. But the colour is still a little too blue for my liking (the greys are too blue in the images - in reality they are a much more neutral grey). Oh well! Practice makes perfect!
11/11/2008
Subscribe to:
Post Comments (Atom)


0 comments:
Post a Comment